Walls are the unsung heroes of any room — they show fingerprints, scuffs, stains and the slow build-up of everyday life.
Learning how to wash your wall the right way returns that clean backdrop and protects paint and finishes so your space looks cared for, not worn out.
Below is an SEO-friendly, step-by-step article that walks you through materials, exact steps (first, second, third…), unique tips for each stage, and ends with useful facts and advantages.
Why you should wash walls (short primer)
Regularly cleaning walls removes dust, allergens, grease and marks that degrade paint and wallpaper. Whether you’re preparing to repaint, staging a home, or simply seeking a fresher feel, knowing how to wash your wall is a small skill with big returns.
What you’ll need (materials & tools)
Before starting, gather these items so the work goes smoothly:
Soft microfiber cloths or sponges (non-abrasive)
Bucket(s)
Warm water
Mild dish soap or pH-neutral cleaner formulated for walls
White vinegar (optional, for stubborn marks on paint)
Baking soda (for spot cleaning scuffs on durable paint)
Magic eraser (use sparingly; test first)
Soft-bristle brush or old toothbrush (for corners, trim, switch plates)
Dry towels or lint-free cloths for drying
Drop cloth or old sheets to protect floors and furniture
Ladder or sturdy step stool for higher areas
Rubber gloves (if you have sensitive skin)
Step 1 — Clear the area and protect surfaces (first)
Start by moving furniture away from the wall or covering it with a drop cloth. Lay a cloth along the baseboard to catch drips.
Unique tip: Tack a magnet or small sticky note at the top corner of each wall section you finish — it’s a visual way to avoid redoing spots and keeps you organized in larger rooms.
Step 2 — Dust and dry-clean the wall (second)
Use a dry microfiber cloth, long-handled duster, or vacuum with a soft brush attachment to remove loose dust, cobwebs and pet hair, starting from the top down.
Unique tip: Use a dry paint roller (no paint) to quickly pick up dust from textured walls — it’s faster than wiping and reaches into crevices.
Step 3 — Test a hidden area (third)
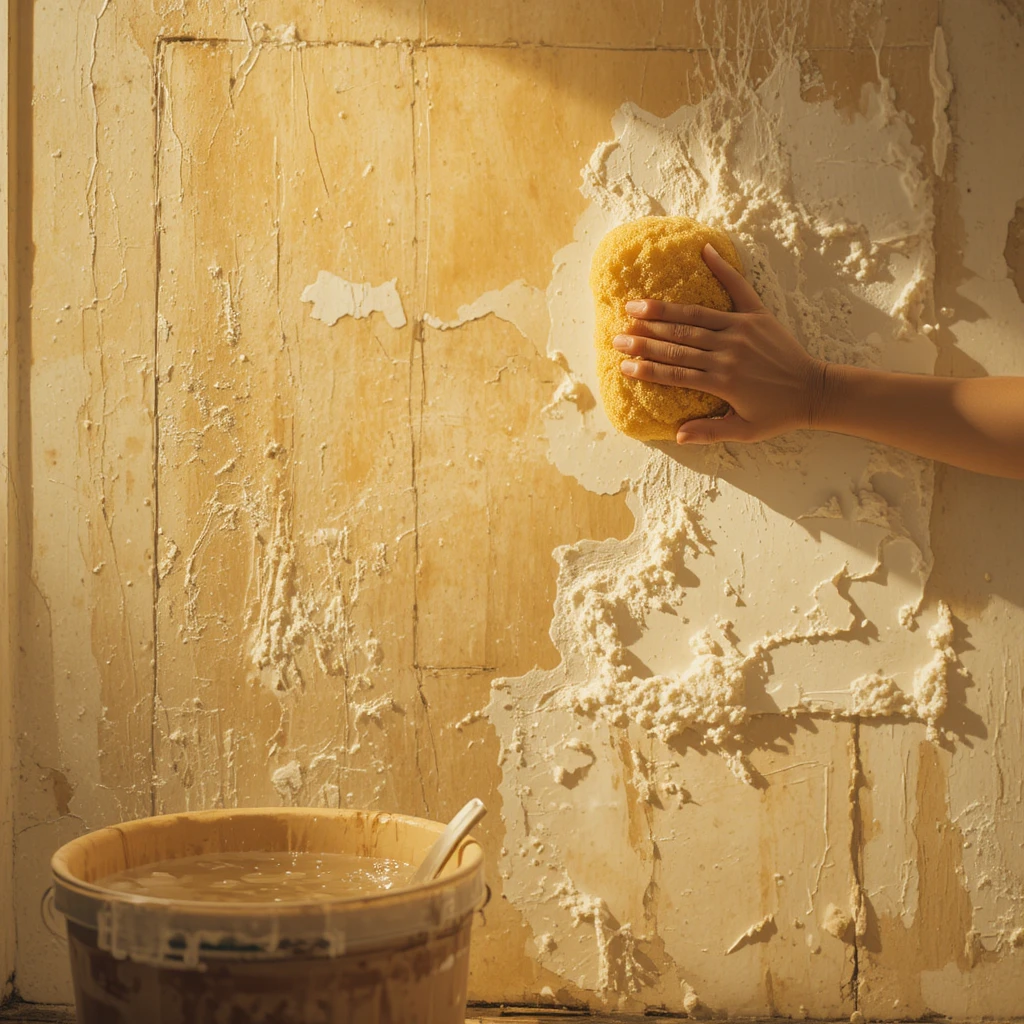
Mix a mild cleaning solution (a few drops of dish soap in a bucket of warm water). Test on an inconspicuous patch near a corner or behind furniture to ensure the cleaner won’t strip paint or harm wallpaper.
Unique tip: Press a piece of clear tape over the test area after it dries; if paint flakes when you pull it away, avoid wet cleaning — consider dry methods or consult a pro.
Step 4 — Clean from top to bottom in sections (fourth)
Work in manageable vertical sections about 3–4 feet wide. Dip a microfiber cloth or sponge in the cleaning solution, wring until damp (not dripping), and wipe in smooth vertical strokes. Rinse the cloth frequently and change water if it gets dirty.
Unique tip: For large open-plan rooms, label each section with a small piece of painter’s tape marked with a number. This helps maintain a steady rhythm and ensures no area is missed.
Step 5 — Attack greasy or marked spots (fifth)
For greasy kitchen walls or stubborn fingerprints, add a splash of white vinegar to the cleaning bucket (approximately 1 part vinegar to 4 parts water), or use a dedicated degreaser on a cloth and blot gently.
Unique tip: For small scuffs use a paste of baking soda and water applied with a soft cloth — rub gently in a circular motion then wipe clean. This acts like a low-grade abrasive without damaging most paints.
Step 6 — Careful use of stronger tools (sixth)
If marks persist, use a magic eraser very gently. Always test first and avoid areas with matte or delicate finishes. For textured paint, a soft-bristle brush with your solution can dislodge dirt from crevices.
Unique tip: Keep a “gentle to stronger” hierarchy: microfiber → vinegar solution → baking soda paste → magic eraser. This protects paint and wallpaper while increasing cleaning power only when necessary.
Step 7 — Rinse and remove residue (seventh)
After cleaning each section, immediately rinse the area with a fresh, damp cloth to remove soap residue which can attract dirt if left behind. Follow with a dry lint-free towel to prevent streaking.
Unique tip: For high-humidity rooms, dry the wall but leave a small airflow (fan or slightly open window) to speed final drying and reduce the risk of moisture affecting paint adhesion.
Step 8 — Clean trim, switch plates, and corners (eighth)
Switch plates and baseboards show dirt quickly. Use a damp cloth or small brush to clean edges, taking care around electrical components (turn off power if needed).
Unique tip: Remove switch plates and soak them in warm soapy water for a few minutes; dry fully before reattaching to avoid trapped moisture.
Step 9 — Spot-treat wallpaper, vinyl or specialty finishes (ninth)
Wallpaper and decorative wall finishes need gentler methods. For washable wallpapers, use very diluted soap and blot — do not rub. For non-washable paper or delicate murals, consult the manufacturer or a professional.
Unique tip: Use a soft cosmetic sponge and blot upward rather than scrubbing; this prevents paper seams from lifting.
Step 10 — Final inspection and maintenance plan (tenth)
Once walls are dry, walk the room with soft lighting angled across surfaces to reveal missed spots. Do small touch-ups with your cleaner or a damp cloth. Make a maintenance schedule — light dusting monthly and a full wash every 6–12 months depending on use.
Unique tip: Keep a small “wall-care kit” with your tested cleaning solution in a sealed bottle and a labeled microfiber cloth in a drawer for quick touch-ups that prevent bigger jobs.
Tips to boost results and care
Use a mild pH-neutral cleaner to protect modern water-based paints.
For rental homes, always test first — tenants can be charged for paint damage.
In kitchens, tackle grease monthly to prevent a heavy buildup that needs harsh chemicals.
In children’s rooms, keep a quick-clean cloth handy; immediate blotting prevents stains from setting.
Repeating the main topic
If you’ve been searching for how to wash your wall, follow these ordered steps to work smart, not hard. The methodical approach preserves finishes and gives reliable results every time.
Facts and advantages (closing)
Facts
Most modern latex paints are washable and withstand mild soap and water.
High-gloss and semi-gloss paints are easiest to clean; matte paints can be more delicate.
Regular cleaning removes allergens and significantly reduces dust-related breathing irritants.
Advantages
Restores a room’s brightness and makes colors appear truer.
Extends the life of paint and delays the need for repainting.
Improves indoor air quality by removing dust, mold spores and residues.
Cost-effective home refresh without painting or renovation.
Final notes
Knowing how to wash your wall is an easy habit that keeps rooms looking cared for and protects your investment in paint and wallpaper.
With the right materials, a tested method, and these unique tips for each step, your walls will stay fresh, inviting, and ready for whatever life brings next.