Keeping floors spotless can instantly make a home look fresh and organized.
Many people mop their floors regularly, but small mistakes can reduce the effectiveness of cleaning.
These Floor Mopping Tips focus on doing the right things in the right order so your floors stay cleaner for longer.
This article explains what you need, how to prepare, and step-by-step Floor Mopping Tips that improve results without extra effort.
Things You Need Before Starting Floor Mopping
Before beginning the cleaning process, preparing the right tools helps save time and prevents damage to your flooring.
A good quality mop (microfiber or cotton)
Bucket with wringer
Mild floor cleaner suitable for your floor type
Warm water
Vacuum cleaner or broom
Dry cloth or microfiber towel
Gloves
Optional: vinegar solution for deep cleaning
Having these ready will make the process smoother and allow you to follow the Floor Mopping Tips correctly.
Step 1: Remove Dust and Loose Dirt First
The first step in effective Floor Mopping Tips is cleaning the dry debris before using water. Dust, crumbs, and sand can turn into muddy streaks when mopped directly.
Start by sweeping the floor using a soft broom or vacuum cleaner. Focus on corners, under furniture, and along walls where dirt collects easily. This step improves the mopping process because the mop will only handle stains and sticky spots instead of spreading dust around the room.
Tip: Move furniture slightly to clean hidden areas that usually remain dirty.
Step 2: Choose the Right Cleaning Solution
Not all floors require the same cleaning product. One of the most important Floor Mopping Tips is selecting a cleaner that suits the surface.
Tile floors: Mild detergent or tile cleaner
Wooden floors: Wood-safe cleaning solution
Marble or stone floors: Gentle pH-neutral cleaner
Vinyl floors: Light floor cleaner mixed with warm water
Using the wrong cleaner can dull the surface or leave marks. Always read product instructions and avoid strong chemicals that can damage the floor.
Tip: Mix the solution properly instead of adding extra cleaner, which often causes sticky residue.
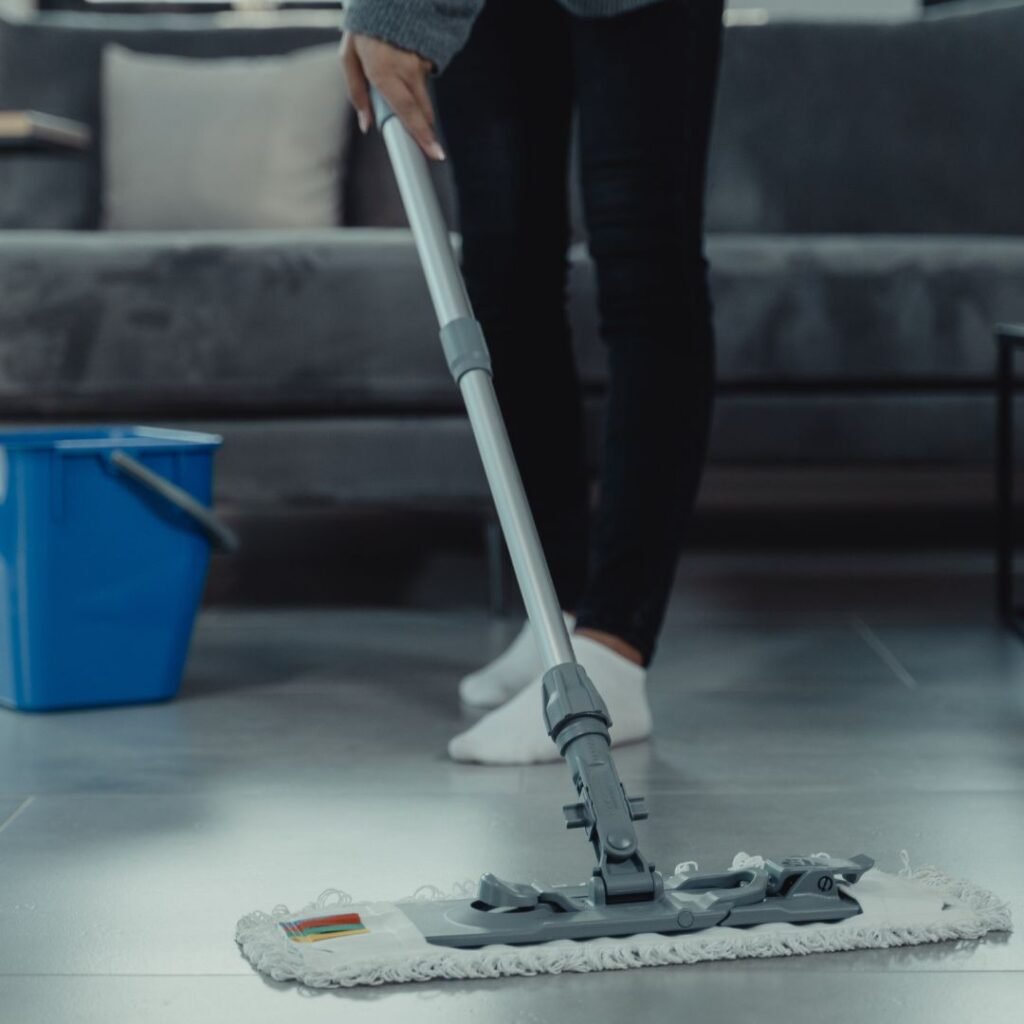
Step 3: Prepare the Mop the Right Way
Another useful part of Floor Mopping Tips is preparing the mop correctly before touching the floor. Dip the mop into the bucket and wring it well so it is damp, not soaking wet.
Excess water can damage wood floors and leave streaks on tiles. A slightly damp mop works better because it lifts dirt instead of pushing water around.
Tip: If the mop water becomes dirty quickly, change it to keep cleaning effective.
Step 4: Start Mopping From the Far Corner
One of the smartest Floor Mopping Tips is to plan the direction of cleaning. Begin mopping from the farthest corner of the room and slowly move toward the exit.
This prevents stepping on wet floors and leaving footprints after cleaning. It also keeps the cleaning pattern organized.
Use smooth strokes and avoid random movements that miss areas. Mopping in sections helps cover the entire room properly.
Tip: Work in small zones so each area gets proper attention.
Step 5: Use the Right Mopping Pattern
The pattern you use while mopping makes a noticeable difference. One of the most effective Floor Mopping Tips is using an “S” or figure-eight motion.
This method:
Collects dirt efficiently
Reduces streak marks
Covers more floor area evenly
Instead of dragging the mop in straight lines repeatedly, this pattern traps dirt in the mop fibers.
Tip: Rotate the mop head often to use the clean side.
Step 6: Focus on Stains and Sticky Areas
Sometimes regular mopping is not enough for tough spots. An important part of Floor Mopping Tips is giving extra attention to stains.
Apply a small amount of cleaner directly on sticky areas and gently scrub with the mop or cloth. Avoid using rough materials that may scratch the floor surface.
Kitchen floors, entryways, and dining areas usually require extra cleaning.
Tip: Let the cleaning solution sit for a few seconds before wiping stubborn stains.
Step 7: Rinse the Mop Frequently
One of the often overlooked Floor Mopping Tips is rinsing the mop regularly. Dirty mop water spreads grime instead of removing it.
Every few minutes:
Dip the mop in clean water
Wring it thoroughly
Continue mopping with fresh moisture
This keeps the floor looking bright and prevents dull marks after drying.
Tip: Replace the water once it becomes cloudy.
Step 8: Dry the Floor for a Better Finish
Drying is an essential step in professional Floor Mopping Tips. Many people skip this step, but drying improves shine and prevents slip hazards.
Use a dry microfiber cloth or allow proper ventilation so the floor dries faster. For wooden floors, drying helps protect the surface from water damage.
Tip: Open windows or turn on fans to speed up the drying process.
Step 9: Clean the Mop After Use
Proper mop maintenance is another important part of Floor Mopping Tips. After finishing, wash the mop head thoroughly and let it dry.
This prevents bacteria growth and unpleasant smells. A clean mop also ensures better cleaning next time.
Tip: Replace mop heads regularly for better hygiene and efficiency.
Extra Unique Floor Mopping Tips That Many People Miss
These additional Floor Mopping Tips can make your cleaning routine even more effective.
Mop during daylight to spot missed dirt easily.
Use warm water instead of cold water for better cleaning power.
Avoid overusing soap to prevent sticky floors.
Clean high-traffic areas more frequently than other spaces.
Keep separate mops for kitchen and bathroom floors.
Add a few drops of essential oil for a fresh scent.
Test new cleaners on a small hidden area first.
These small habits can make a big difference in maintaining clean floors.
Facts About Floor Mopping
Here are some interesting facts related to Floor Mopping Tips and cleaning floors.
Microfiber mops can remove more bacteria compared to traditional cotton mops.
Regular mopping improves indoor air quality by reducing dust buildup.
Floors can collect more germs than many commonly touched surfaces.
Warm water helps break down grease more effectively than cold water.
Proper mopping can extend the life of flooring materials.
Advantages of Following Floor Mopping Tips
Applying these Floor Mopping Tips offers several benefits for your home and daily cleaning routine.
Cleaner Living Environment
Consistent mopping removes dirt, allergens, and bacteria from floors.
Improved Floor Appearance
Shiny and spotless floors enhance the overall look of your home.
Longer Floor Lifespan
Proper cleaning methods prevent scratches and damage.
Safer Home
Clean and dry floors reduce the risk of slips and accidents.
Time-Saving Cleaning Routine
Organized steps make the mopping process faster and more efficient.
Final Thoughts
Using the right Floor Mopping Tips can transform a simple cleaning task into a highly effective routine.
By preparing tools, following the correct order of steps, and applying smart cleaning methods, floors remain cleaner, safer, and more attractive.
Small improvements like rinsing the mop, choosing the correct cleaner, and drying the floor can create noticeable results in every room of your home.
Consistency and proper technique are the key to maintaining spotless floors every day.